When you think about the process of painting a room in your home, your first thought is probably about painting the walls themselves. After all, this can be a time-consuming task requiring several coats of paint (and maybe a ladder).
However, knowing how to paint your baseboards properly is just as important as doing a good job of painting the walls.
Painting the baseboards in your home is a process consisting of multiple, crucial steps. Missing even one step could affect the durability and quality of the paintwork on your baseboards, and this can make a bigger difference to the overall look of the room than you might think.
This is a short and simple guide to painting your baseboards to achieve a professional finish that will last for many years to come.
Painting Baseboards: What You’ll Need
You can’t paint baseboards properly without the right tools for the job! Here is what you will need:
- Semi-gloss latex paint
- Trisodium phosphate
- Primer
- Wood putty
- Putty knife
- Sash brush (1-2 inches)
- Drop cloth
- Goggles
- Gloves
- Sponge
- Bucket
- Sandpaper (fine-grit)
- Masking film
- Painter’s tape
Steps To Painting Your Baseboards
Step 1: Clean
Before you do any painting, the first thing you need to do is thoroughly clean your baseboards.
This is so important because painting over dirt and grime will lessen the durability of the coat of paint and may result in an uneven, lumpy coat.
Bear in mind that even if your baseboards look clean to the naked eye, you should still clean them because dust, grime, and general dirt and debris settle at the bottom of the walls in your home, so there’s pretty much always something to clean off your baseboards.
This is where you’ll use your drop cloth to protect the floor and apply a diluted trisodium phosphate using a sponge. Pay special attention to the tops of the baseboards since this is where most of the dust and dirt will have collected.
Step 2: Fill Depressions And Gouges
Baseboards are areas of walls that typically have some gouges or depressions due to nails and furniture being knocked into them. This isn’t a problem, but it’s best to use wood filler to patch them up to ensure an even coat of paint.
Use your putty knife to fill gouges and larger depressions. It’s fine to leave small, pinpoint depressions unfilled if they were made by a brad nailer, although depressions left by finish nails should be filled with wood filler as much as possible.
Step 3: Sand Lightly
To ensure you’re working on a smooth, even surface, it’s a good idea to lightly sand the baseboards using fine-grit sandpaper. A sanding sponge will work too, as long as it’s flexible.
If your baseboards are fairly new and have a few coats of paint on them, you might be able to skip the sanding process, but older baseboards with less or damaged paint should be sanded first.
Step 4: Protect The Floor And Walls
You’re almost ready to start priming and painting your baseboards at this point, but first, make sure you protect your walls and your floor so you don’t get any product on either surface.
First, use painter’s tape (low-stick, so you don’t remove any paint from the wall when you remove it) to protect the wall’s edge where it meets the baseboards. Masking film will provide extra protection if you feel this is necessary.
You should also add some of this tape to the floor if it’s a hard floor. Alternatively, you should lay down some plastic sheeting to protect the carpet.
Step 5: Apply Primer
It’s now time to apply the primer. Priming the baseboards is a really important step if they’re not already primed. Even if the baseboards have been primed before, if the primer is not in good condition, it should be reapplied.
The first step is to mix the primer well before dipping the brush into the solution without oversaturating it. You don’t want any drips.
Hold the brush before your forefinger and thumb (think about how you would hold a pen) and work horizontally using the ends of the bristles. Use long strokes and work slowly to ensure an even, accurate coating of primer.
Lap marks can also be an issue when it comes to applying primer to baseboards, but you can avoid this by painting over the edges of where you just painted before it has time to dry.
This is called keeping a wet edge and it’s one of the best techniques you can use when painting baseboards if you want the final result to look professional.
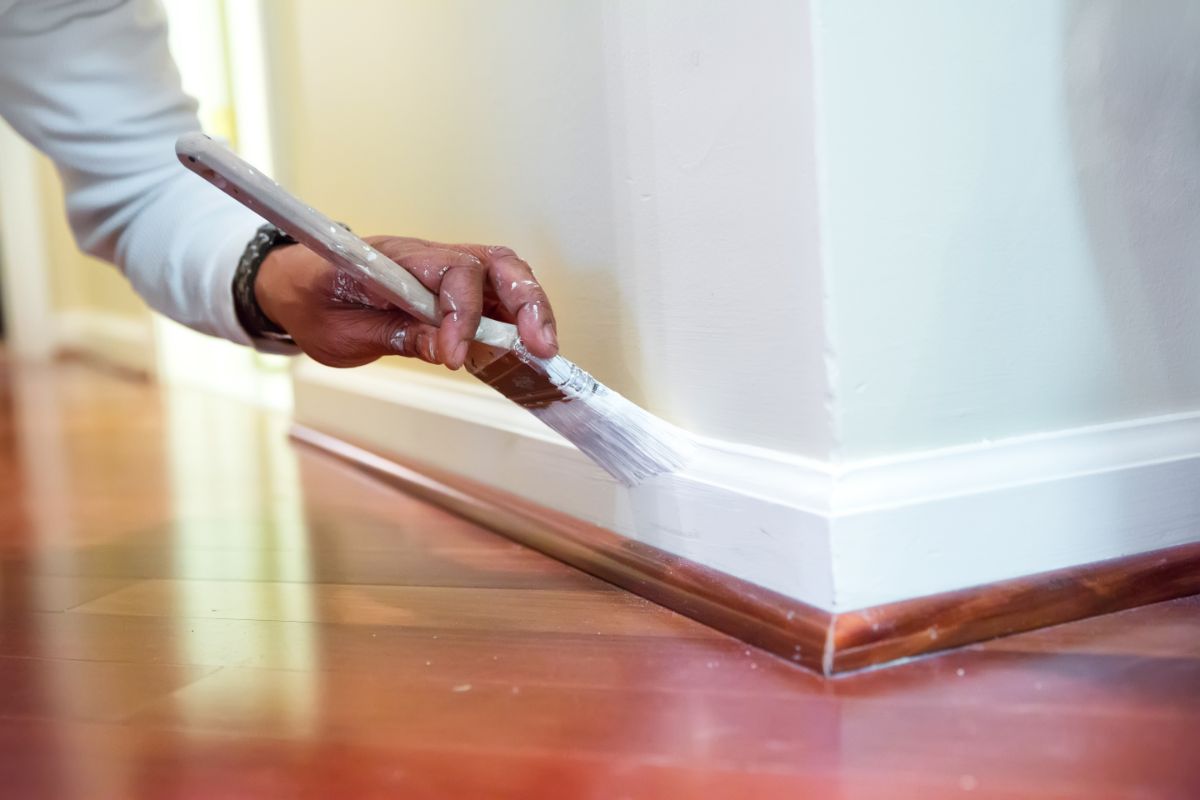
Step 6: Get Painting
After waiting for the primer to dry, you can finally start actually painting the baseboards.
Make sure to stir the paint well (or shake it) if the can has been sitting around for a while. Again, make sure not to oversaturate the brush so that the paint doesn’t run, and you don’t want more than a third of the bristles to be covered length-wise.
Using long strokes like you did from the primer, work slowly across the baseboards in the same direction. Your strokes will need to overlap to ensure full coverage, so try to maintain a wet edge to make sure you don’t end up with lap marks.
After you’ve done this, all you have to do is wait for the paint to dry and your baseboards should be finished. Make sure to wash your tools immediately so that the paint doesn’t dry and damage the bristles of your brush.
Final Thoughts
Painting baseboards isn’t the one-step process that many first-time DIY-ers think it is, but it’s also easy if you have the right tools and follow all the steps.
Always make sure to clean your baseboards, fill gouges and large depressions, sand if needed, and apply primer before actually starting to paint.
Read the instructions on the paint container to check the correct drying time and don’t allow any items to touch the baseboards during this time.

Hi, my name is Joel Adams and I like to think of myself as a professional DIYer. Whatever odd jobs a person needs to be done around the house, I’m their guy.
I’m talking shelves, making sideboards and tables, painting feature walls… the list is neverending!
- How To Drill Into Brick? - October 31, 2022
- How To Repair And Refinish Hardwood? - October 31, 2022
- Floetrol – What Is It? When To Use It: Complete Guide - October 31, 2022