If your hardwood floors are looking a bit rough and have lots of scratches and nicks it may be time for a refinish. But don’t worry if you are intent on refinishing hardwood floors a DIY guide is all you need to help you out.
With our help you will be able to tell what your floor is made from, laminate, engineered wood or solid hardwood. We will then walk you through the process of refinishing your floor from start to finish.
As the old saying goes 90% of the work is in the preparation and this is one of those times when this really is the case. Proper preparation will make the work of refinishing your hardwood floors so much easier.
So let’s get stuck in and find out how you go about refinishing hardwood floors, DIY style.
Is Your Floor Really Hardwood?
Before attempting to refinish your hardwood floors it’s important to determine if they are genuine hardwood or something else.
There are types of flooring that resemble hardwood but are not made of solid wood and are actually layers of different materials.
Your flooring may be laminated, engineered flooring or solid hardwood. It is usually easy to tell which material your flooring is made from by look and feel.
Laminate Plank Flooring
Laminate plank flooring is made from layers of material with a top layer that is embossed with a pattern to resemble real wood.
This can mimic most types of hardwood flooring in general appearance, but a close inspection will reveal that it is not the real thing.
A laminate floor is a cheaper alternative to hardwood flooring but is not suitable for refinishing.
Engineered Wood Flooring
Engineered wood flooring does have a genuine hardwood layer, but this is just a thin veneer on top. Underneath is typically a layer of strong plywood.
It is more hard wearing than laminate flooring, and it is possible to refinish some engineered wood flooring.
However the thickness of the top layer of hardwood will determine whether you can sand it down to refinish the surface. If you sand it down too much you will reveal the plywood underneath.
Genuine Hardwood Flooring
When you have genuine hardwood flooring you will certainly be able to refinish it, but again you should check the depth of the planks. To be safe you should have at least ¾ inch of hardwood if you want to completely resurface the floor.
Can You Refinish Your Floor?
A general rule of thumb with solid hardwood floors is that they can be refinished four or five times before you need to replace them.
This is because each time you refinish the floor you are sanding some of the surface off and there is only so many times you can do that before you have no floor left.
Refinishing an engineered hardwood floor is a bit more tricky as the layer of hardwood will not be as thick as solid hardwood. If the veneer is at least ⅛ inch thick then you may be able to refinish the floor once or twice.
If the veneer is 3/16” thick then you may be able to refinish the floor three or four times. Generally it is not recommended to machine or hand scraped engineered hardwood floors as the layer of hardwood is thin.
What Finish Is Your Floor?
The finish of your hardwood floor may determine if you can refinish it and potentially how often it can be refinished. A machine or hand scraped finish to your floor will have had more of the surface removed and this will make it more difficult to refinish.
Smooth finished hardwood floors can be refinished five or six times as they will have more surface thickness to them.
Thickness Of Floorboards
If you are unsure of the thickness of your floorboards there are a couple of ways you can check this.
One method is to find a floor vent or grate that you can take out and which lets you expose the floorboards. Then you can take a measurement of the flooring thickness.
Another method is to take up a threshold in a doorway into the room where the floor is going to be refinished. Beneath the threshold there will usually be a gap between the floorboards in the doorway which will allow you to measure their thickness.
If you laid the flooring yourself perhaps you kept some of the flooring for repairs or color matching. If so you can measure the thickness of these spare pieces.
As a last resort, if you are unsure of the thickness of the flooring remove a baseboard in the room.
Typically, these are not removed during refinishing, so you may be lucky enough to expose an original piece of flooring that you can measure for thickness.
Be warned though some professionals will remove baseboards when refinishing floors to prevent them getting damaged in the process and to achieve a more aesthetic finish.
So you may not know if you are looking at the original floorboards or ones that have previously been refinished.
Re-coat Or Refinish
When you have determined what your floor is made from you may want to consider whether you need a complete refinish or if a re-coat would be sufficient. This will depend on the condition of the floor, your time and budget.
A re-coat will be quicker and cheaper but may not hide all the blemishes in your floor. A refinish is a much bigger job, takes longer and will cost more even when you are doing the work yourself.
To decide which project to undertake it is a good idea to carry out a test on the floor.
How To Test Your Floor For Re-coat Or Refinish
To test your floor for either a re-coat or a refinish first tape off two separate areas. They don’t have to be large areas, around 6 inches by 6 inches is enough.
However, the areas that you choose are important and will give you a good idea of how your floor will react to either process.
First choose an area that has the most visible damage and wear to see how it would respond to a re-coat. The second area should be one that is regularly exposed to cleaning products such as window spray or furniture polish.
The reason for this area is that residue from cleaning products on the floor can interfere with how the floor surface holds a polyurethane finish.
Make sure that you only carry out this test if you are definitely going to make a substantial change to your hardwood floor.
Once you have sanded an area of the floor you are committed to going ahead with the work or living with a square patch of sanded floor.
The Test
Now that you have your two sectioned off squares take a piece of sandpaper of 120-grit and sand the areas. Vacuum up the resulting dust and then wipe the area down with a damp cloth to remove any residual dust.
When the areas are completely dry apply a layer of polyurethane to each one. You can use either oil based or water based polyurethane. Let it dry and then check the finish.
While you may be happy with how the floor looks you will need to check if the polyurethane has taken especially to the area that is regularly exposed to cleaning products.
To check this use a coin or other blunt metal object and gently scrape the surface.
If the polyurethane doesn’t come off then you are good to go for a re-coat. However, if it does come off then you will need to do a complete refinish.
Remember to use a blunt object for the test and not a sharp or pointed one as even a solid coating would come off with these.
How To Refinish Your Hardwood Floor
So now you have done your test and decided that a whole refinish is required on your hardwood floor. Don’t worry though, you can do a good DIY job as long as you do the right preparation and take your time.
If you get this part right then the rest will fall into place and the results will be great. You will need to gather all the materials that you are going to use and then get stuck into the preparation. Finally you will be sanding, staining and sealing the floor.
Materials
The materials that you need may vary slightly depending on the thickness of your floorboards and the size of the room but in general they will be as follows:
- Drum or large orbital sander
- Handheld orbital and detail sander
- Various grit sanding sheets
- Wood filler
- Molding bar or putty knife
- Hammer
- Plastic sheeting
- Masking tape
- Floor stain
- Polyurethane sealer
Preparation
The first thing to do as part of your preparation is to remove the shoe molding or quarter round from the bottom of your baseboards around the whole perimeter of the room. To do this use a molding bar or a putty knife and gently ease it off.
Do not use anything bigger like a demolition bar as this will potentially damage the shoe molding.
If there are any doors that may block the thresholds remove them temporarily. Now you need to go over the entire floor and search for any protruding nails or screws that would tear a sanding pad. Tap them down with a hammer or screw them back in.
Make a note of where any of these nails or screws are so that you can go back and fill them in with wood filler after your first sanding pass. Tape off any floor grilles or registers to protect them from any damage from the sander.
Finally, take your plastic sheeting and masking tape and cover all openings apart from exterior windows. This includes baseboard vents, doorways, and electrical outlets.
Before Sanding
Sanding creates a lot of dust, so you should minimize how far it travels in your home and what areas it affects. Remember to have your dust mask and eye protection ready too.
Before you kick-start that sander you need to sweep or vacuum the floor to clear it of any debris that could cause damage as you start sanding.
Now you are ready to begin sanding. The main area of the floor will be done with a large walk behind drum or pad sander. These can be hired for the day or weekend, so you don’t need to buy one.
You will also need plenty of sanding pads or sheets depending on which type of large sander you are using.
You will also be using the handheld orbital sander for around the edges of the floor and the detail sander to get into the corners and more awkward areas of the floor.
Types Of Sanding
The type of sander that you use will depend on the condition of the floor surface as well as your experience using a large floor sander.
Drum sanders are quite robust pieces of equipment that are notoriously difficult to operate for beginners or DIY enthusiasts.
A walk-behind orbital sander is a much more gentle machine to operate and will take out most moderate and light imperfections from your hardwood floor.
Make sure when you hire one that you get a thorough demonstration of how it works and any safety precautions you need to take while using it.
Have a practice run in an inconspicuous area without the sandpaper attached to the pad, so you are comfortable with it before you sand the floor.
Sanding
For the first pass over the floor attach a rough grit sandpaper to the pad, a 36 or 40 is usually enough. As you maneuver the orbital sander around the room make sure that you keep moving.
Don’t stop in any one place for more than a couple of seconds.
Get as close to the edge of the room as possible without hitting the baseboards.
When you have done the first pass use the hand held orbital sander and the detail sander at the perimeter and corners. Use firm pressure but don’t press too hard or linger in one place for too long.
Nail Holes
After you have completed the first pass, vacuum up the dust before doing the next pass. If you have any nail holes or gouges to fill now is the time to do it with your wood filler.
As a DIY method use some of the dust from your sanding and some white wood glue, mix the two together to form a paste and fill any holes in the floor with this.
Changing Grit
The second pass of the sander should be done with a finer grit sandpaper than the first pass. Essentially every pass that you do is sanding out the abrasions from the previous pass. So you will be using a finer grit with each pass.
Cleaning Up
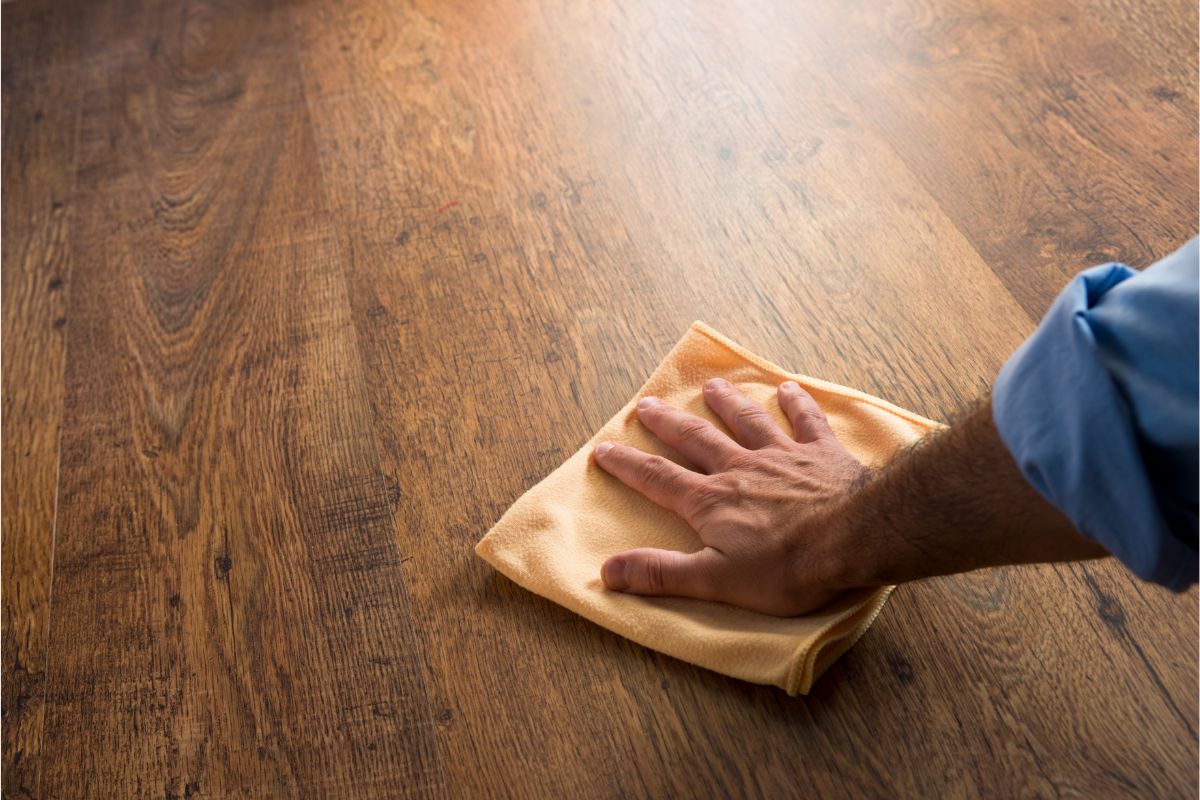
When you have finished all the sanding, vacuum the entire floor to remove excess dust. To fully clean the floor use a rag with some paint thinner on it and wipe down the surface of the floorboards to take all dirt and dust off.
Finally once the paint thinner has dried go over the floor with a clean tack cloth. This will prepare it for the staining process.
Staining
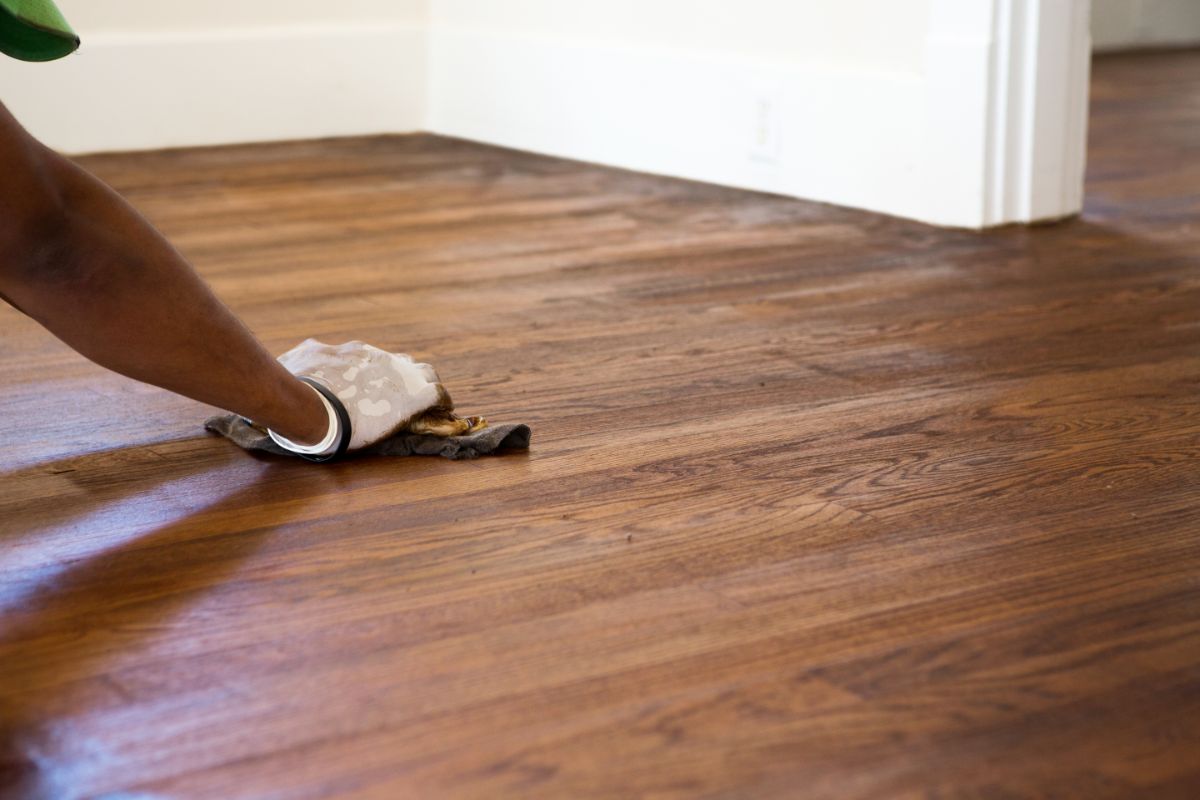
When the floor is sanded, cleaned and completely dry it is ready to be stained. One of the quickest and most effective ways to stain a floor is by using a floor coating tool to spread the stain.
This is a T shaped spreader, almost like a squeegee but with a foam sleeve.
Always start from the furthest point of the room and work your way towards the door. Pour the stain onto the floor in a long line and work along this line spreading the stain evenly across the floorboards.
Occasionally dab the foam head of the spreader on the unstained floor to remove excess floor stain. This prevents you from having too much and causing puddles to form.
For the edges of the floor and around any features such as floor registers, use a paint brush to cut in the stain
When you get towards the end of the room control the amount of stain you are pouring out, so you don’t end up with an excess. Depending on the floor and condition of the wood you may want to add two to three coats of stain.
If you are doing multiple coats check the stain manufacturer’s instructions on drying times and sanding between coats.
Sealing
Once the stain has dried you will want to seal the floor. Of course, it’s perfectly possible to seal an unstained floor if that’s the look you would prefer.
Some people like the rustic look of an unstained floor and for this you can simply seal the sanded down hardwood floor.
Water Or Oil Based?
There are two types of polyurethane seal for hardwood floors, water based and oil based. Neither is particularly better than the other; it is simply a matter of preference which one you choose.
However, there are differences in the color of the finish. An oil based polyurethane will have a yellow to amber color while water based polyurethane will dry clear.
The oil based polyurethane does give an initial yellow finish, but this will deepen over time.
Water based polyurethane will dry a lot quicker than an oil based one. While this is good when you are applying multiple coats it doesn’t give you as much time to apply the sealant.
This polyurethane is also thinner and potentially more difficult to work with.
If you make a mistake then you will have to work fast to rectify it or risk sanding it down and starting again.
An oil based sealant gives you a lot more time to work it in, but it does give off fumes so will require good ventilation, and you will need to wear a mask.
An oil based floor seal also take much longer to dry between coats, sometimes up to 24 hours, but this can depend on the conditions.
Finally, the cost of water based polyurethane seal is higher than its oil based alternative.
Sealing On Top Of Stain
If you stain your hardwood floor first and then seal it you should let the stain dry according to the manufacturer’s instructions before applying the polyurethane.
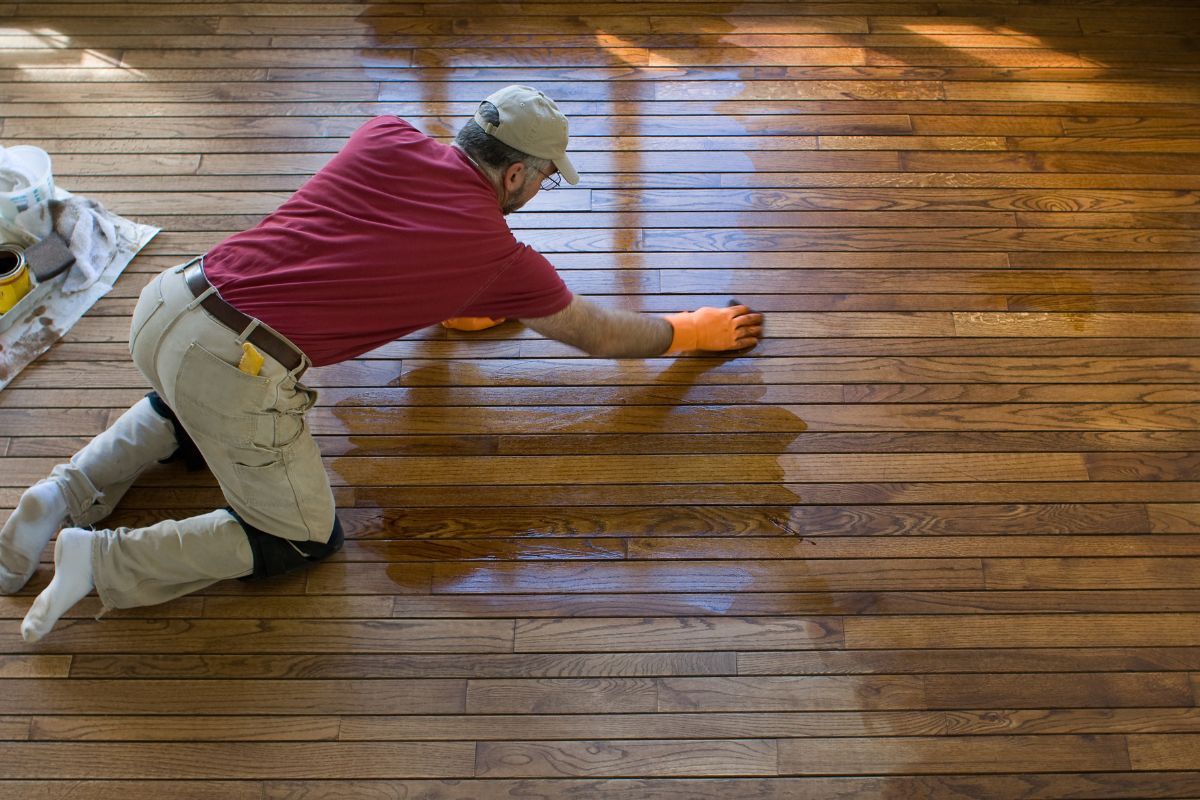
To apply polyurethane to your hardwood floor use a wool applicator for the main area using smooth, even strokes to apply it. This method avoids getting any bubbles in the polyurethane and affecting the final finish.
Around the edges of the floor, a synthetic fiber brush is best for cutting in water based polyurethane and natural fibers for an oil based seal. For oil based applications you will need two coats and for water based three coats are recommended.
When you have added the final coat of polyurethane let it dry completely and then reattach your shoe moldings to the bottom of the baseboard.
Final Thoughts
Refinishing hardwood floors as a DIY project can be highly rewarding and very effective. The key is to take your time, plan ahead and prepare the floor thoroughly before staining or sealing the wood.
Check what your floors are made from, laminate, engineered wood or solid hardwood. Depending on this, check what depth you can sand to.
Then choose your sander, the color of your stain and the type of polyurethane seal. Prep your tools and you’re ready to go.
DIY refinishing of your hardwood floors can save you a lot of money, and you will feel a real sense of accomplishment having done it yourself.
If you’ve never refinished a hardwood floor before it may be a good idea to start with a small room at first and work your way up to bigger areas.
With the right tools, time and preparation you can transform your hardwood floors and make them look like new again.

Hi, my name is Joel Adams and I like to think of myself as a professional DIYer. Whatever odd jobs a person needs to be done around the house, I’m their guy.
I’m talking shelves, making sideboards and tables, painting feature walls… the list is neverending!
- How To Drill Into Brick? - October 31, 2022
- How To Repair And Refinish Hardwood? - October 31, 2022
- Floetrol – What Is It? When To Use It: Complete Guide - October 31, 2022