Vinyl plank flooring has become very popular in recent years. This is because it is hard wearing, durable and resembles hardwood flooring but for a fraction of the price.
One of the best things about it is that it is very DIY friendly. So we have described how to install floating vinyl plank flooring, a DIY guide for those who want to give it a go.
You don’t need any power tools either as all of the cutting and trimming can be done with a handsaw or pull saw.
We give you all the insight you will need to successfully install vinyl plank flooring in your home including discussing the different types available, how to lay it and the most common mistakes that people make with this kind of flooring.
Types Of Vinyl Plank Flooring
There are two ways in which vinyl plank flooring can be installed. There is a glued down version and a floating version. For the purpose of this guide we’ll be dealing with the installation of floating vinyl plank flooring.
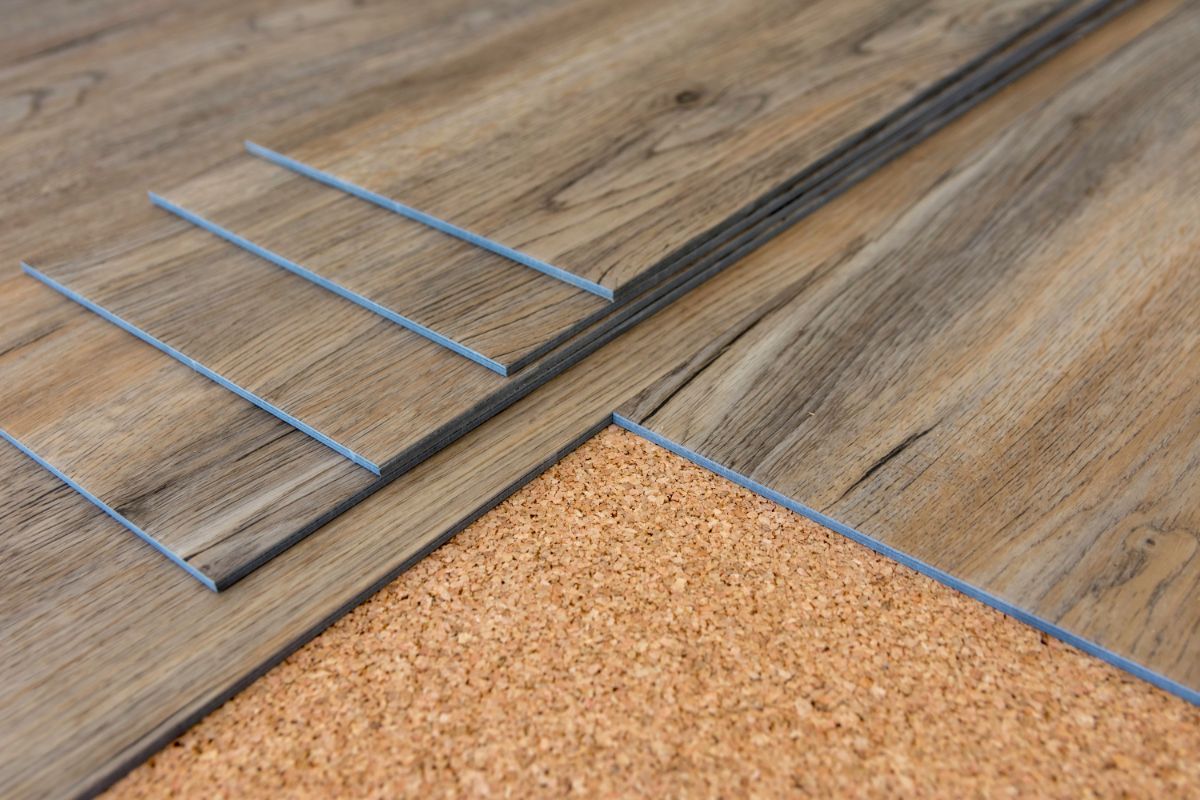
For a DIY job, floating or click-lock vinyl flooring is often easier to install. There is no messy adhesive and if you make a mistake laying a board you can simply take it up again and reposition it. A basic tongue and groove system makes this possible.
Floating vinyl flooring is so called because it sits above the subfloor or existing floor without being glued down. This allows it to expand and contract with temperature and humidity fluctuations.
A gap of ¼ inch should be left around the entire perimeter of a floating vinyl floor to allow for this expansion. If there is no gap when the vinyl flooring expands it will buckle and warp as it has nowhere to go but up.
The gap will be hidden by your shoe molding or quarter round.
How To Lay Vinyl Plank Flooring
To effectively lay floating vinyl plank flooring you need to do some careful planning and preparation. This will make the whole job much easier and minimize the risk of making mistakes.
Planning
Perhaps the most important stage of installing floating vinyl flooring is planning the layout. In particular, you need to decide which way the planks are going to run.
This will typically be the longest length of the room which reduces the amount of cutting you’ll need to do.
Measuring the room is really important in the first instance as this will tell you how much flooring you will need.
Taking the furniture out first will make this process easier and allow you to take into account how many obstacles the flooring needs to go around.
You can draw the plan out on graph paper to calculate the amount of flooring, the number of cuts, how to lay out the pattern and give you a plan to work from. Alternatively you can use a 3D modeling program on your computer.
Preparation
Preparing the area to be covered in vinyl plank flooring will affect the final result, so this is a really important step in the installation.
As well as emptying the room and measuring the floor space the other important part of the preparation is the vinyl planks themselves. It is advisable to leave the flooring to acclimatize in your home for at least 48 hours before laying them.
Any type of flooring is affected by temperature and humidity. Allowing the vinyl planks to get to the same temperature as your home eliminates the risk of expansion or contraction problems after installation.
Materials Needed
As well as the flooring that you are going to lay, you will also need the tools to install the vinyl planks. These can be fairly basic hand tools or power tools.
The following is a list of the most common ones that are used when laying vinyl floating flooring.
- Flush cut saw
- Circular saw
- Jigsaw
- Hammer
- Drill
- Rubber mallet
- Spacers
- Carpenter’s square
- Tapping block
- Razor knife
- Pry bar or metal putty knife
- Tin snips
- Transition trim
- Shoe mold or quarter round
Unpacking The Vinyl Flooring
Once the vinyl flooring has had a chance to acclimatize to the temperature and humidity of your home you can unpack it.
To ensure that the pattern achieved is as random as possible, separate the planks out into piles putting all the same patterned planks together.
Then as you are laying your flooring you can take from alternative piles to make sure that you get a good mix and a random pattern. This is much easier than choosing each plank from the pack.
Installing Vinyl Plank Flooring
There are several steps in laying vinyl plank flooring, and it is a good idea to take your time at every stage to avoid any potential mistakes.
Choose A Pattern
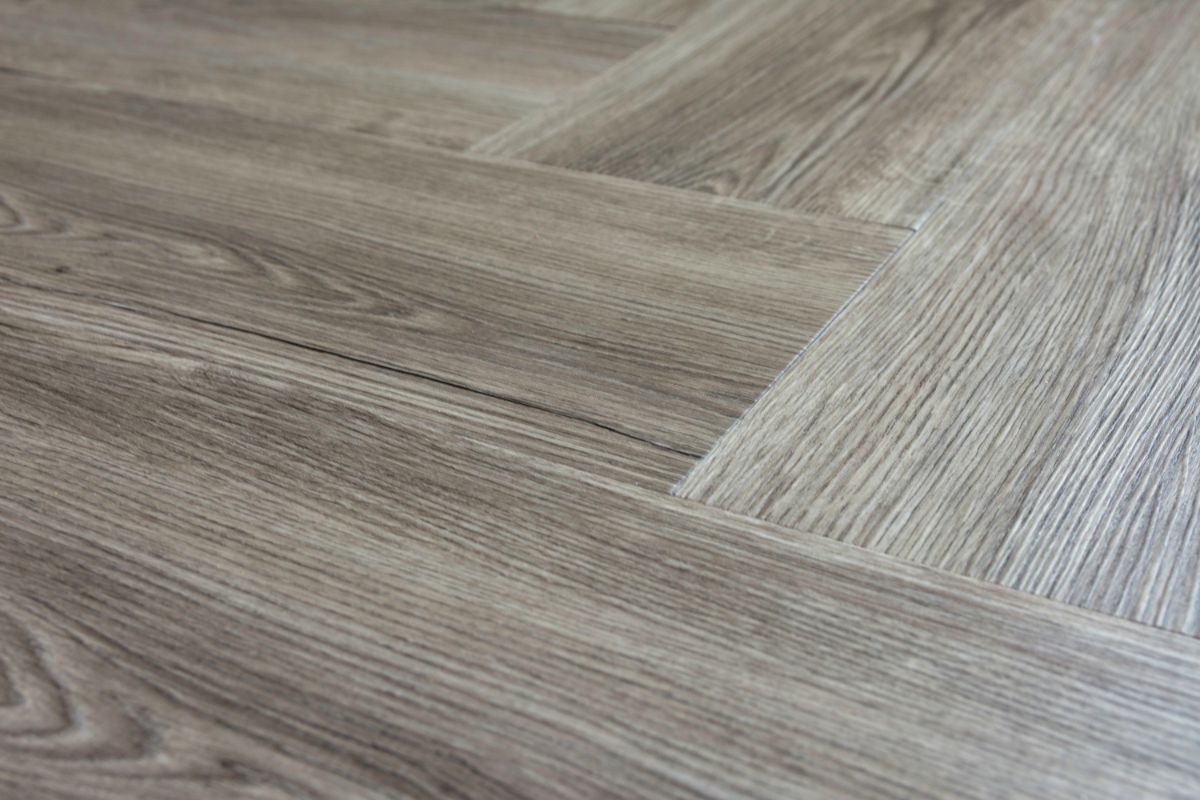
Deciding on a pattern is not simply a case of choosing the nicest one. The direction that the vinyl planks are laid in will determine how much flooring you need. If you are going for a straight lay then you will need to add an extra 10% to allow for cuts.
In a herringbone pattern you need to allow an extra 15% and more or less the same amount for other patterns.
Choosing a pattern should take into consideration your personal preference but also the shape of the room, what light sources it has and any features in the room.
Running the planks in the same direction as the most prominent wall or largest window in the room will give the space a more open feel. It is also more aesthetically pleasing to the eye to run the flooring planks in this direction.
Prepare The Subfloor
Check the subfloor for any protruding nails or screws that could potentially damage your vinyl planks. Tap down any nails with a hammer and screw down any problem screws.
At this point you should have removed any quarter round, shoe molding or your baseboards. It’s also important to make sure that the subfloor is clean and that there is no debris that can get trapped underneath the vinyl planks.
Check your subfloor to make sure it’s level and if not use a leveler compound before fitting the vinyl flooring.
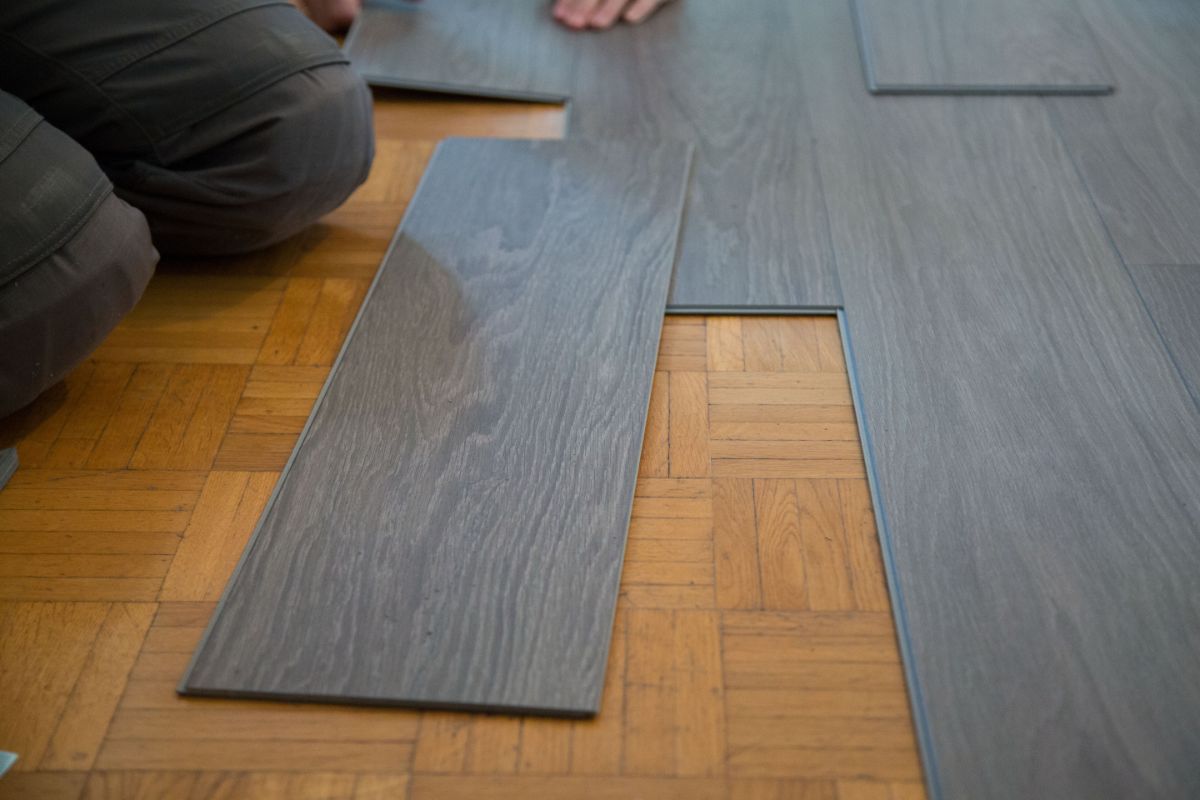
You can also fit this type of flooring over existing flooring, but it should be level and smooth. It will also be necessary to account for the new floor height in relation to doors and baseboards.
If the flooring you are installing is pre-fitted with underlayment there will be no need to lay a separate layer underneath it.
For vinyl flooring that hasn’t got this attached you should lay strips of underlayment in the same direction that you are laying the flooring, with slight overlaps.
Prepare The Doorway
To join the vinyl flooring to the adjacent flooring in the doorway you will need an appropriate transition strip. If the adjoining floor is hard flooring of the same height you can use a T mold transition strip.
But if the other flooring is higher such as carpet then a multi-purpose reducer or threshold can be used.
You may have a transition strip that matches the vinyl flooring and these normally come with a track that is fixed to the subfloor and the transition strip snaps into this.
In the doorway you will want the vinyl planks to slide underneath the door jambs for a neat and secure finish.
To cut the door jambs to the right height use a scrap piece of the vinyl plank flooring and mark where you need to cut the door jamb so that it slips underneath.
Start The First Row
To start the first row you need to make sure that either this row or the final row will not be too thin. You should have worked this out during your preparation. It will not look good if your final row is just a couple of inches wide.
Typically you will remove some of the width of the first row. This is best done with a power saw as it is difficult to make a straight neat cut along the length with a hand saw.
When laying your own flooring you will discover that walls are hardly ever square. The best way to make sure that your flooring goes down straight is to square the room before you start. But what does ‘squaring the room’ actually mean?
This involves measuring the walls that are running parallel to the flooring. Take a measurement at either end of the room. If there is a difference between these two numbers, subtract the larger number from the smaller and divide by two.
You can then calculate the angle that you need to cut the first row to. This should be done with a circular saw or jigsaw, although you can cut it with a fine tooth hand saw as long as you mark the line carefully.
Lay the first row and use a soft mallet and a tapping block to get the ends of the planks tight up together.
You should have shims taped along the wall keeping the expansion gap between the length of vinyl flooring and the wall. It will probably be necessary to cut the last piece to fit at the end of the row.
It is possible to score the back of the plank and then break it over a piece of wood. This should give a clean cut, or alternatively you can use a power or hand saw.
Lay The Floating Vinyl Planks
With the first row in place you can now begin to connect the next row via the tongue and groove system. Use the tapping block and rubber mallet to make sure there is a firm connection between the planks and that the end to end connection is flush.
When you are installing the last board in a row it can get a little tricky and be a tight fit. For this you should use a pull bar and a rubber mallet to ensure a secure connection.
Make sure that the joins between planks are not lined up in adjacent rows. The joins should be staggered as per your layout planning. Use offcuts where you can to start rows and create a random pattern.
Most manufacturers recommend a 6-8 inch gap between seams.
As you are working on subsequent rows you should use something heavy to weigh down the flooring you have already laid. This will prevent it from moving as you are fitting the rest of the rows.
One option is to use dumbbells but make sure to protect the floor against scratches or other damage.
As you are laying the planks choose alternatively from the different piles where you have grouped pieces with the same pattern. This will prevent you using planks with the same pattern next to each other which will look odd.
Continue laying the planks, marking them when you get to corners and other obstacles and cutting them to fit. Cut small pieces at a time so that you don’t accidentally take off too much at one time.
If you have problems getting the tongue and groove mechanism to fit snugly together check that there is not any debris blocking the groove.
Work methodically until you get to the end of the room.
Finishing Touches
When you have finished laying all the floating vinyl plank flooring go over the floor once more and check all the connections using the pull bar and mallet if necessary.
Now you can remove all the shims taped around the walls and get ready to refit the baseboards or shoe mold.
Use a nail gun to fit a shoe mold and make sure that you are nailing it into the baseboard and not into your new vinyl flooring.
Not only would this damage the vinyl flooring but will prevent it from expanding and contracting and cause warping. The whole purpose of having a floating floor is so that it can react to temperature and humidity changes and move when it wants to.
You can now fit your transition strip in the doorway of your room. Cut it to size and put it in the previously fitted metal channel. Press the transition strip into place and then tap with your rubber mallet to make sure it is securely fitted.
And you have now completed the installation of your floating vinyl plank flooring.
Mistakes To Avoid When Laying Vinyl Plank Flooring
To keep your vinyl flooring in great condition during installation there are a few things you should avoid doing. We have listed eight of the most common mistakes people make when fitting this type of flooring, so you don’t make the same ones.
Protruding Subfloor Fasteners
Taking the time to go over your subfloor before laying the vinyl flooring is vital. If you assume just by looking at the floor that it’s ok you may not find out until it’s too late that it wasn’t.
Because a subfloor spends its life hidden for the most part, the installers may not have been as careful as they could have been when countersinking screws or driving in nails.
Go over the subfloor carefully and feel as well as look for any protruding fasteners.
If the previous floor covering was carpet with underlay then you may have to pull out a lot of staples from the floorboards too.
Leaving Baseboard Installed
Many people leave the baseboard installed when they are fitting vinyl flooring and just remove the quarter round or shoe molding. While this is potentially quicker if the previous flooring was carpet you will need a thicker molding to hide the gap.
By taking out the baseboard you can more neatly fit the vinyl flooring, it also makes inserting the shims for the expansion gap a lot easier. Use a specially designed trim pull to remove the baseboards cleanly while keeping them intact.
Not Leveling Floor
If the subfloor is not level the vinyl flooring sitting on top of it will have gaps and will click when you walk on it. Use a long bubble level to check the subfloor in several different places to see how level it is.
If there are dips or hollows in the floor then these will need to be filled with floor patch and leveler or something similar. When screeding this compound make sure you use the right length straight edge, preferably metal to level it all out.
A short piece won’t be as effective and a wooden straight edge is not always straight. Once it is dry check the levels again before proceeding with laying the vinyl flooring.
Not Undercutting Door Jambs & Trim
You will want the vinyl flooring to slip underneath the door jambs for a neater and more secure installation. To do this you will have to cut the right amount off the bottom of the door jambs and any trim.
To do this use a scrap piece of your vinyl flooring and mark its height on the door jamb with a pencil. Use a multi-tool with a reciprocating blade to trim off these pieces.
If you don’t undercut the door jambs and trim you will need to scribe the flooring around these obstacles and then use caulk to fill in any gaps. This is more work and much messier.
Ending Rows With Small Planks
As a general rule you don’t want to end a row with a piece that is less than 8 inches long. The way to make sure that this doesn’t happen is to take accurate measurements of the room and plan out the cuts to your boards before you start.
Remember to take into account anything in the room that you will need to cut around. If it looks like you will have a piece at the end of the row that is small then reduce the length of the first plank and this will make the last one a more acceptable length.
Thinking You Need Power Tools For Install
Although using power tools can make the job of cutting and installing vinyl flooring quicker and easier it certainly isn’t essential. The vinyl planks can be cut with a utility knife by scoring along the back and then snapping the piece off.
Trimming the door jambs to fit the flooring beneath them doesn’t have to be done with a multi-tool and is just as easily done with a hand saw. You can also use the hand saw to cut the vinyl plank flooring to trim it or make an angle.
Not Planning Bump Outs
Another mistake that you can avoid with careful planning is bump outs. Basically these are just sections of wall or corners that protrude out into the room and that you will need to cut the vinyl plank flooring around to fit it properly.
This is where making a scale drawing on graph paper or using a 3D computer model comes into its own. Or you can just make a note of the measurements and work them into your layout plan.
Putting Holes In Ends Of Planks
If you have a floor vent or pipe that you need to lay the vinyl flooring around you don’t want to have this at the end or long edge of your planks. Instead the best place for these holes is in the middle of the width of the plank and away from the ends.
Measure the dimensions of the vent or pipe, mark it on the plank and then cut out the hole to match. You can use a multi-tool for this or drill a hole and then use a pull saw to finish off.
Final Thoughts
Laying your own floating vinyl plank flooring is not that difficult. The key is to plan ahead, prepare well and take your time. It is better to get the job done slowly and have a great result than to rush it and make mistakes.
We hope this guide to laying floating vinyl plank flooring has been helpful.

Hi, my name is Joel Adams and I like to think of myself as a professional DIYer. Whatever odd jobs a person needs to be done around the house, I’m their guy.
I’m talking shelves, making sideboards and tables, painting feature walls… the list is neverending!
- How To Drill Into Brick? - October 31, 2022
- How To Repair And Refinish Hardwood? - October 31, 2022
- Floetrol – What Is It? When To Use It: Complete Guide - October 31, 2022